
It has been six months since I last blogged! My plan was to write about things other than knitting, crochet and needlepoint (which is mostly what I do) while I was sidelined because of arthritis and bone spurs in my thumbs. That certainly didn’t happen. Although, I have new followers!! Happy about that and having new followers has motivated me to write again.
Thumbs. I know having thumbs sets us apart from other species but I never realized how much we do depend on them until this. Both of my thumbs are affected but my left is the worst of the two. The pain has been incredible. Lifting has been excruciating. Anything really that involves my thumbs has been super painful.
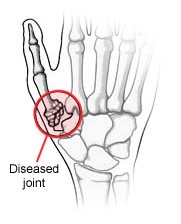
So far, we’ve done soft splints, cortisone injections, warm compresses and just generally going easy on them and resting them. The injections worked for a while but now don’t so we’ve had to get a little creative (more on that later). Surgery is not an option at the juncture which is fine. I’ve had two surgeries and am not looking forward to another (or two). In case you are wondering this is where thumb arthritis usually takes place.
If you are a crafter you can totally understand how not being able to do the things you love can be maddening. So, while we were working out what to do I did some crafting that was not so hard on my thumbs. Can’t use the knitting needles so out came the glue gun.
One of the things I did is make some oil lamps for our patio area and outdoor kitchen. I really like the way they turned out. If you’d like to make some yourself, here’s what you’ll need.
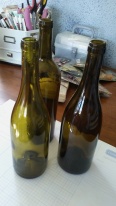
Empty wine bottles
Tiki torch replacement wicks ( I got mine at Walmart)
Brass connectors (diameter big enough for wicks to go through but small enough to hold the wick in place)
Something like this:

Glue gun and glue sticks
Rope, decorative pieces such as flowers, stones, scrapbook embellishments
Now that you have your materials together get that glue gun fired up and decorate your bottles.
Really how you want yours to look is entirely up to you. I took rope and attached it to the bottle winding it around and around using the glue gun to make it stay in place.
Like this:
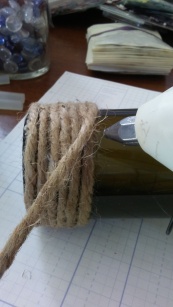
After you have wound it up as far as you want you can leave it plain or add some embellishments. I went to my scrapbooking stash and found some perfect items. Run some more rope up the neck and TaDah!
After putting some fish tank gravel in the bottom of the bottles to make them more sturdy and less likely to fall over take the brass connectors and glued them in the neck so they will stay in place. After that fill up the bottle with lamp oil and slide the wick down through the connector into the bottle.
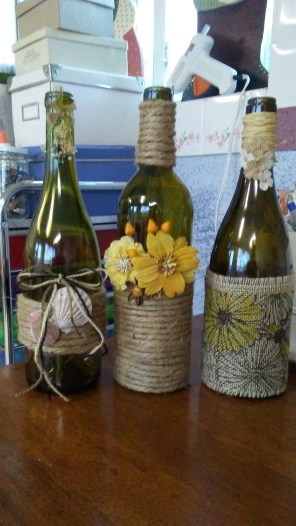
Now you have some perfectly nice wine bottle lanterns! You did it!
These are the three I made. The photo is minus the wicks and connectors. However, you can see that in minutes you could come up with your own lanterns.
I’m sure I don’t need to remind you that you need to be careful with flammables. That’s why I put the gravel in the bottom. And make sure your connector and wick fit snuggly together so the wick doesn’t fall down into the bottle and lamp oil. Disaster will ensue!!
I hope you enjoyed this and will make your own. I would love to see photos of some that you’ve done.
One last thing: Thank you to the new followers. I hope you enjoy reading my posts as much as I enjoy writing them. Drop me a comment anytime!!!
Stitch on my friends! And if you have gimpy thumbs do some gluing instead : )
Tracy